Cool Things in My Kitchen

My new kitchen is full of awesome things and features. It’s a combination of things given to me and/or made by my family, and extra fun touches I added!
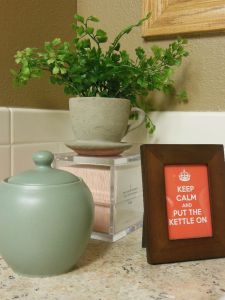
cute tea thingsWorking our way around the kitchen, the first awesome spot in the kitchen is my sink area. On the counter we have a little tea area, complete with a cute sign from a box of tea that my sister-in-law sent me from England! The sink itself is nothing too special, but the faucet is new and I just love it — the faucet pulls out and turns into the sprayer! It is so handy.

 In front of the sink we turned the cabinet fronts into tilt down trays. We used a Rev-A-Shelf kit to install the trays. These have added a great place to store sponges, scissors and a pen!

Kitchen sink

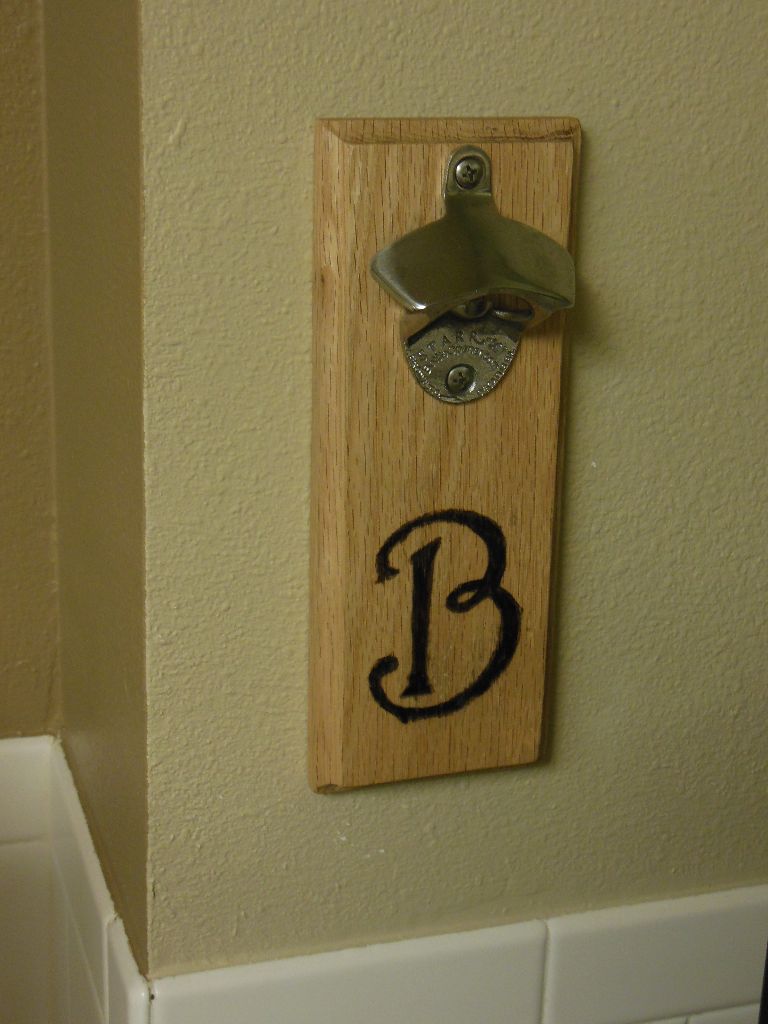
Next we have a bottle opener that my brother, Nickolas, made Matt. It has a really strong magnet inside it that catches the cap as it falls! So cool.

Bottle Opener

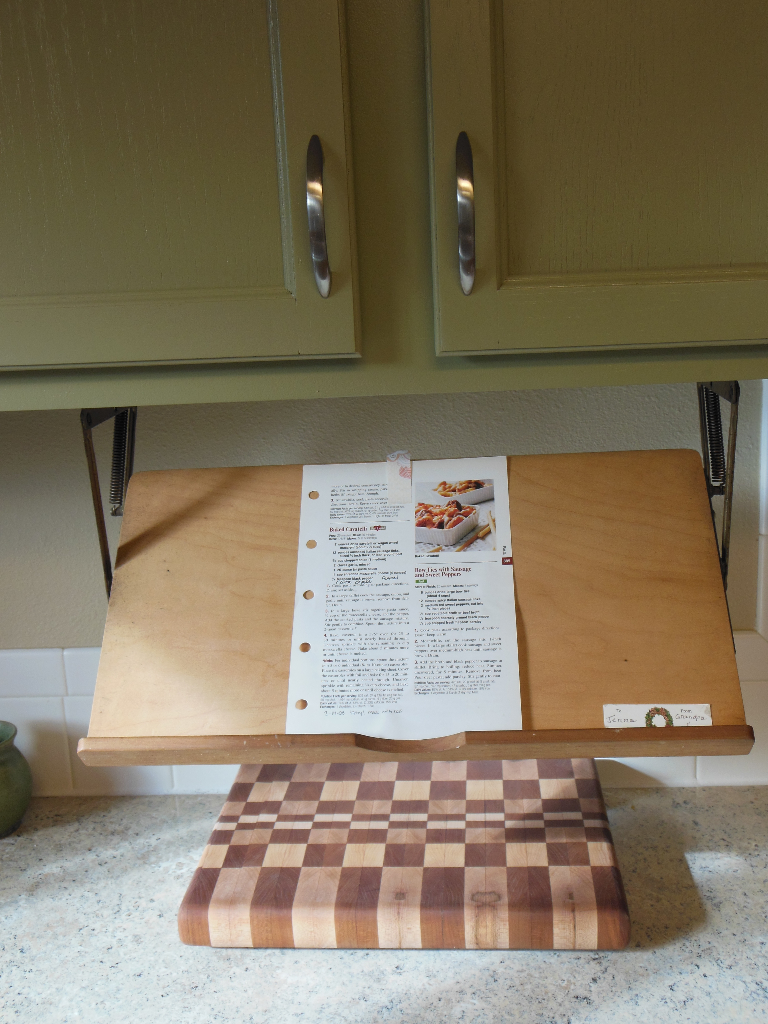
My favorite thing in the kitchen is my pull down recipe holder that used to be my grandmother’s! Also in this picture you can see the beautiful cutting board that Nickolas made us for Christmas last year!

Recipe Rack

Above the microwave is our liquor cabinet and I wanted to give it some personality… I lined it with a wild contact paper (so it will be easy to change later!) and it’s super fun!
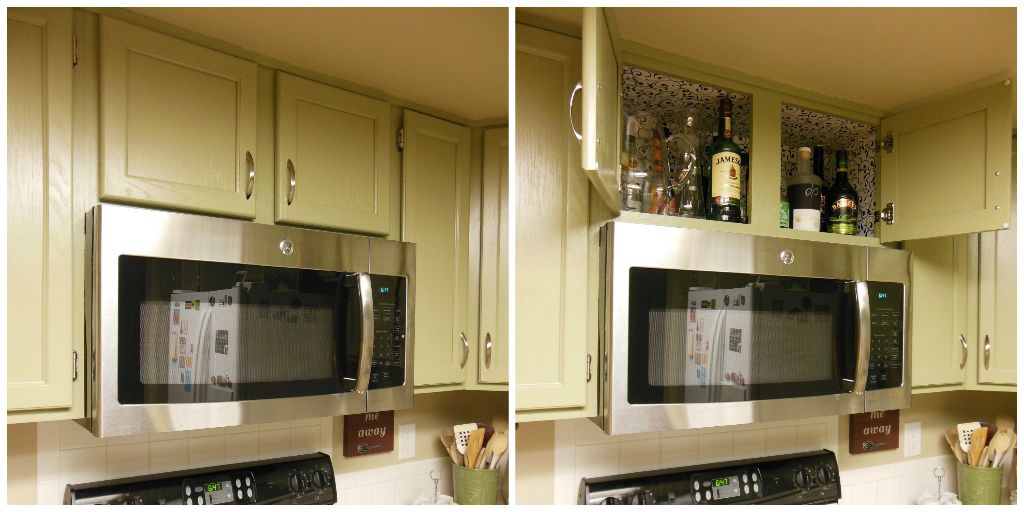

Fun Liquor Cabinetwhisk me awayIn the picture above, the cute sign you see sticking out from under the cabinets says “whisk me away”. It makes me smile!

Next is my wonderful recipe holder that my grandpa made me. It’s full of recipe cards from my family, and recipes I’ve found in magazines and online. If a recipe is good enough to make again, it gets put onto a card and filed in my grandpa’s box. :-) I have the recipes sorted by category, and every recipe is inside a protective sleeve. This system works well for me because I can quickly find all of my favorite recipes, and the protective sleeves are easy to wipe off and clean!
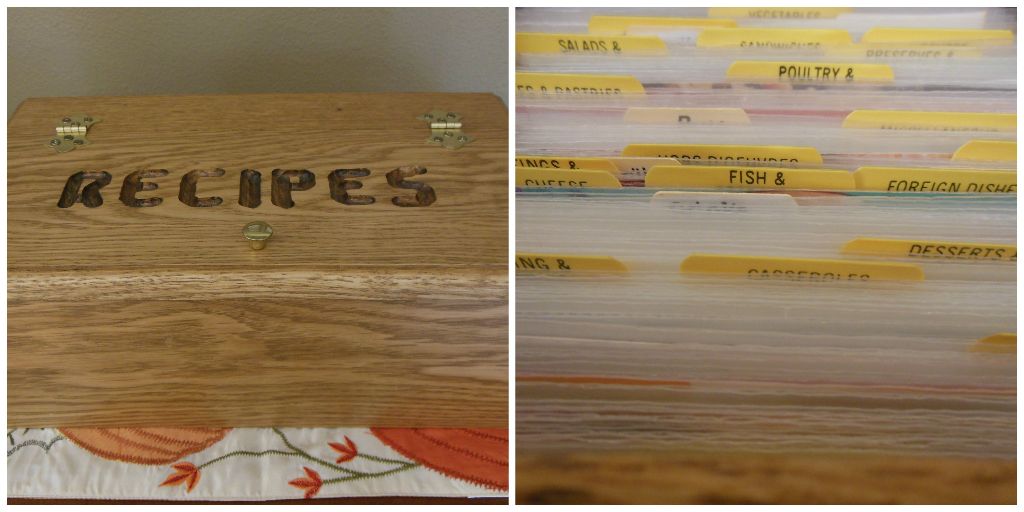

recipe_holderKitchen wall arrangementI also have a really cute wall arrangement in the kitchen! Two of the pieces are by Curly Girl, who just has the cutest things. The other print is from Target, and the tea set is from South Korea!

Those are some of the cool things in my kitchen. What awesome things do you have in your kitchen?
Jane Austen Room

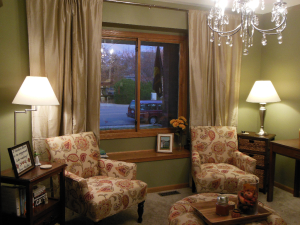
So our new house has a formal dining room. I don’t have much use for a formal dining room though, since we always go home for the major holidays… and we’re pretty casual. Don’t get me wrong; I love having people over for dinner, but my eat-in kitchen table is fine for dinner parties – at least for now! Back to the dining room; we turned it into a library and music room, and since I decided to decorate the room with photos from our trip to Chatsworth in England, I decided that it needed to be called the “Jane Austen Room”.

Jane Austen Room 1

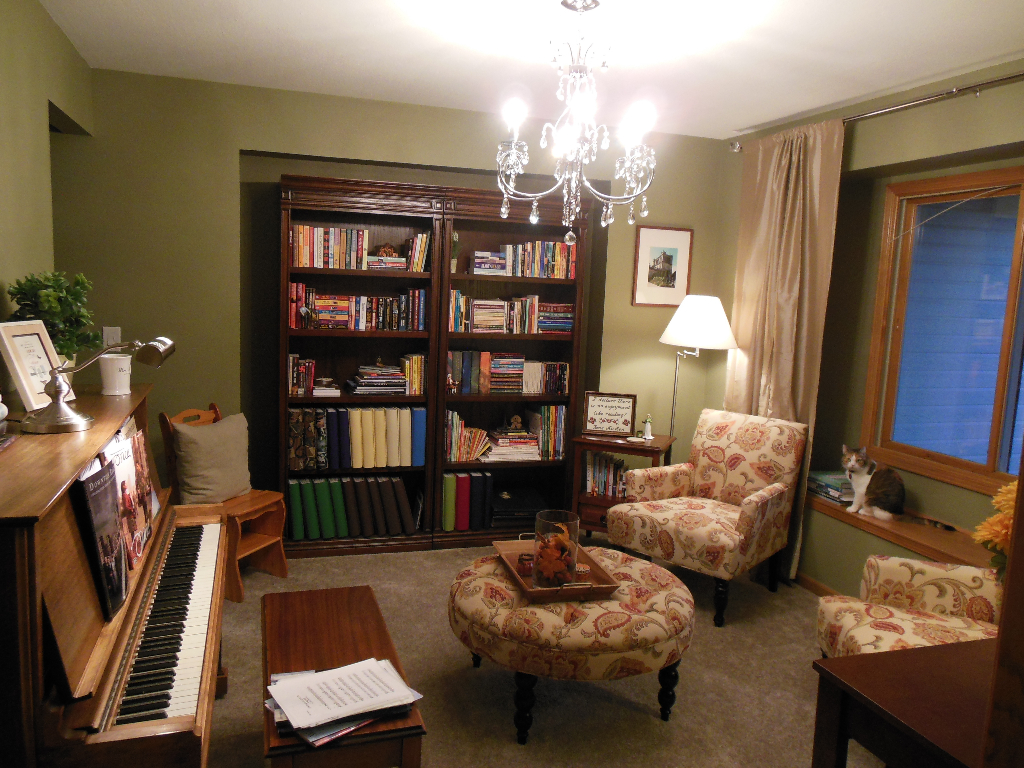
The room is filled with my beautiful piano that originally belonged to my great-grandmother! The piano is over 100 years old. My parents recently brought it out to me from Michigan! And I love having it here.

Jane Austen Room 2

The bookcases are filled with books, a few small trinkets from trips, and some nerdy action figures. I have Mozart and Van  Gogh! I also have a Jane Austen action figure next to a beautiful cross stitch my sister-in-law, Emily, made me for my birthday!

Jane Austen Cross Stitch

The chairs and ottoman are just what I wanted — wild, but still elegant. I love them. :-)

Jane Austen Room 3

I also have a small work area in this room — it’s perfect for storing business documents and materials and mail supplies!

And the new, upgraded light fixture is beautiful and will be also perfect in the future if we ever turn this room back into a dining room!

I love to sit in my Jane Austen Room to play the piano, read, and drink tea. How Jane Austen.

Cork Pumpkin

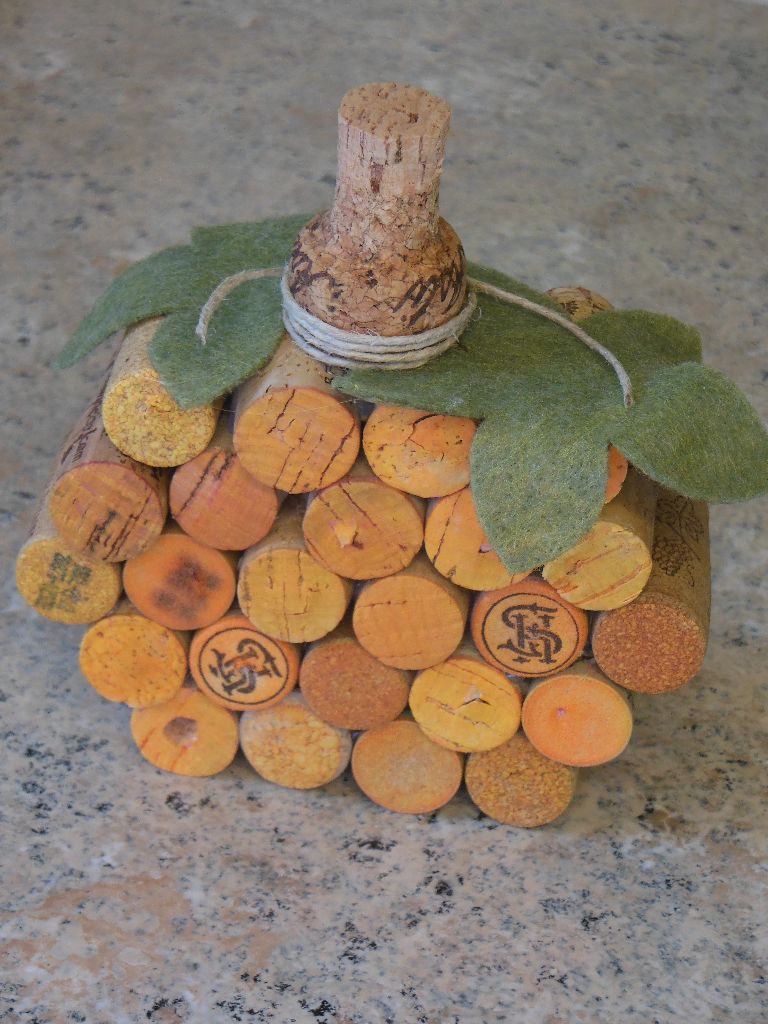
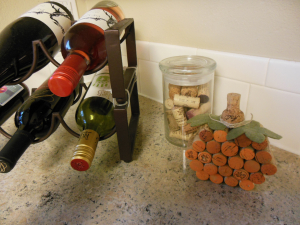
Happy Halloween! Even though my spare time for crafts has been pretty limited this fall, I managed to pull together half an hour to create this adorable cork pumpkin! It was a quick, easy craft, and so cute. :-)

CorkPumpkinThe idea/model for my pumpkin came from this pin on pinterest. When I found it, I knew I just had to make one for myself! I had been saving my corks for another Christmas project (I had used many corks last year for some ornaments)… but I decided to use them for my pumpkin instead!

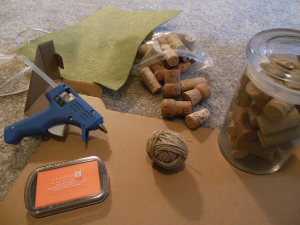
cork pumpkin materialsMaterials:

  • 24 – wine corks
  • 1 – champagne cork
  • string
  • green felt
  • orange stamping ink
  • hot glue gun
  • scissors

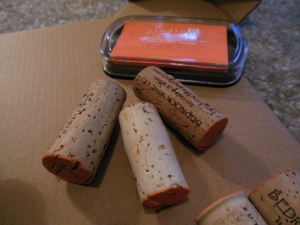
Pumpkin corksFirst I inked each end of all of my regular wine corks. Some of them don’t soak up the ink very well, so you might want to have extra paper or paper towel nearby to stamp off the extra! (Need any orange circles for any other craft?!)

Next I glued my pumpkin together. I probably used more hot glue than I needed, but I wanted to make sure that my pumpkin stayed together!

completed cork pumpkinThen I cut out my green leaves from the felt, glued them on the top of the pumpkin, added the champagne cork and wound some string around it. I didn’t leave much extra string curling around it the stem because I was afraid my cats would eat it… if they weren’t so naughty, I definitely would have!

That’s all it takes! Now I have a cute cork pumpkin sitting next to my wine!

Hide the TV

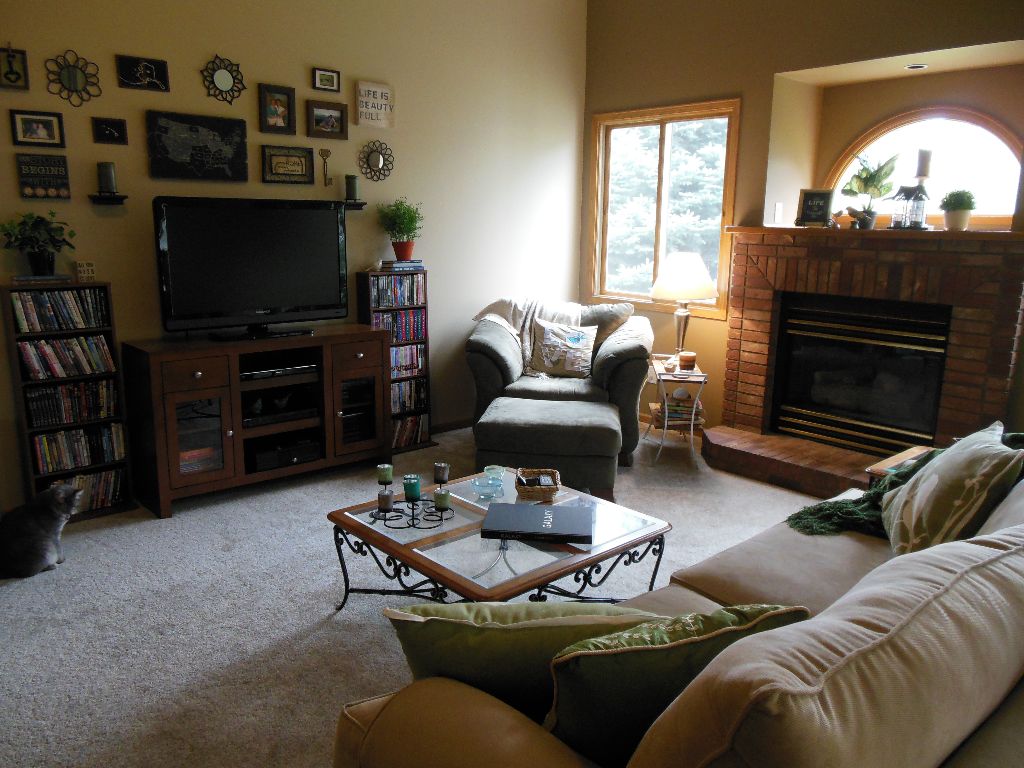
When we moved into our new house earlier this year we gained a lot of space, but it was a very different use of space than what we had at our old house… At our old house we had a living room and a family room. At our new house we only have a living room; there is no family room (yet!). So, even though this house is bigger, suddenly we were short a living space. And this means that our TV is now in our living room.

Now… some people like having TVs in multiple rooms for easy TV viewing… but not me. I thoroughly enjoyed having only one TV in the house, and having it not in my primary living space. And others did too — I received multiple compliments on my not having a TV in my old living room. In that space we were able to enjoy conversation, parties, games, reading, and music without having a big TV there to distract us (even if it’s off, it’s still not pretty to look at). But, as I said, in this new house we don’t have the luxury of two living spaces any more.

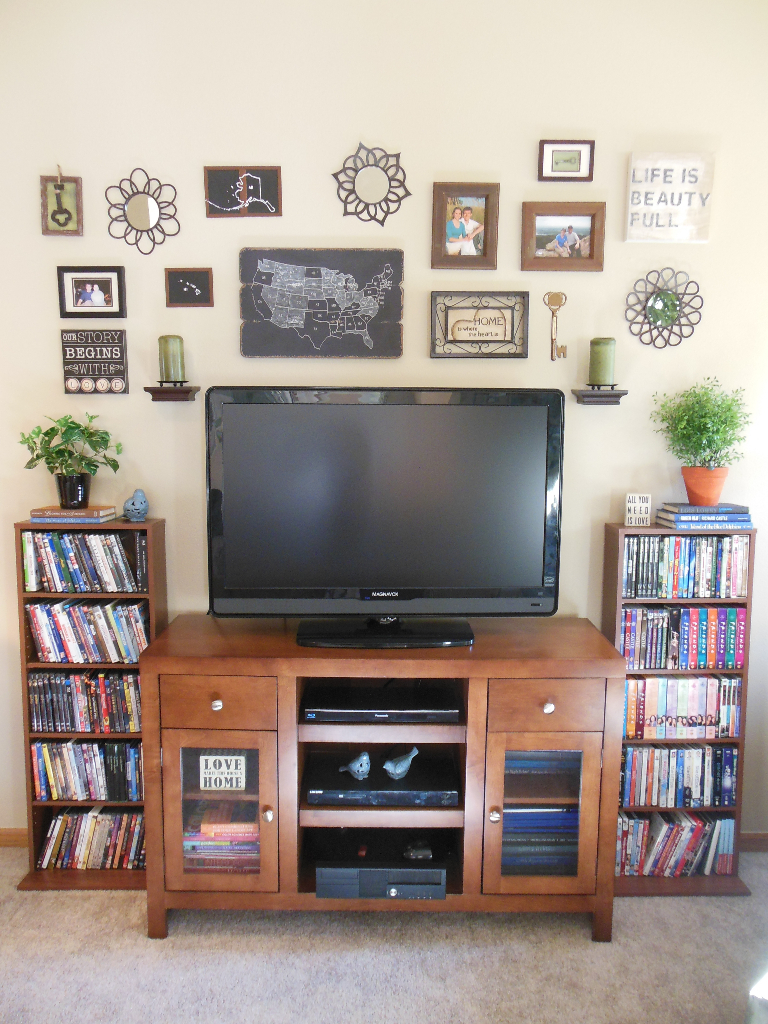
Shortly after we moved in, and before my TV was “hidden”, we had some friends over who noticed right away that there was now a TV in my living room. They commented that it felt strange to have a TV in my living room… but I had a plan. I wanted to “HIDE THE TV” with a wall arrangement!

With the help of pinterest and my mom, I began to pull together ideas and pieces for my new arrangement. Some things were from arrangements at the old house, a couple things are family pieces (an old skeleton key from my great-grandmother’s house, an old key-shaped thermometer from my grandmother’s house), some were new, and some Matt and I made. The pieces all focus on home, love and beauty. (Who doesn’t want those messages portrayed in their living room?)  :-)

Here are a few boards and pins from pinterest that were especially inspiring:

When I felt like we’d collected enough materials, my mom and I arranged the pieces on the floor and then convinced my dad to help us hang everything up! (Thanks, Dad!)

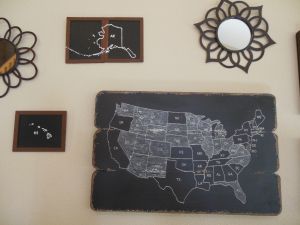
Hide the TV - tv wall arrangementUS chalkboard mapNow we have a beautiful arrangement around our TV that I love to admire and my guests like to look at too. And it’s fun to talk about — Matt and I have colored in the states that we have visited together (it doesn’t count if we didn’t go there together!) and we put special markers on cities that have special meaning to us: we have a heart on Fort Collins (where we live), a heart on Muskegon (where we met), and a block M on Ann Arbor (where we went to school). And there are pictures of us in Muskegon at Lake Michigan, and on Horsetooth Mountain, overlooking Fort Collins.

Now this room feels cozy and comfortable, and it’s so much more interesting to look at!  (And soon we’ll even have some curtains too!)

Living room - hide the tv

Resurfacing Our Countertops

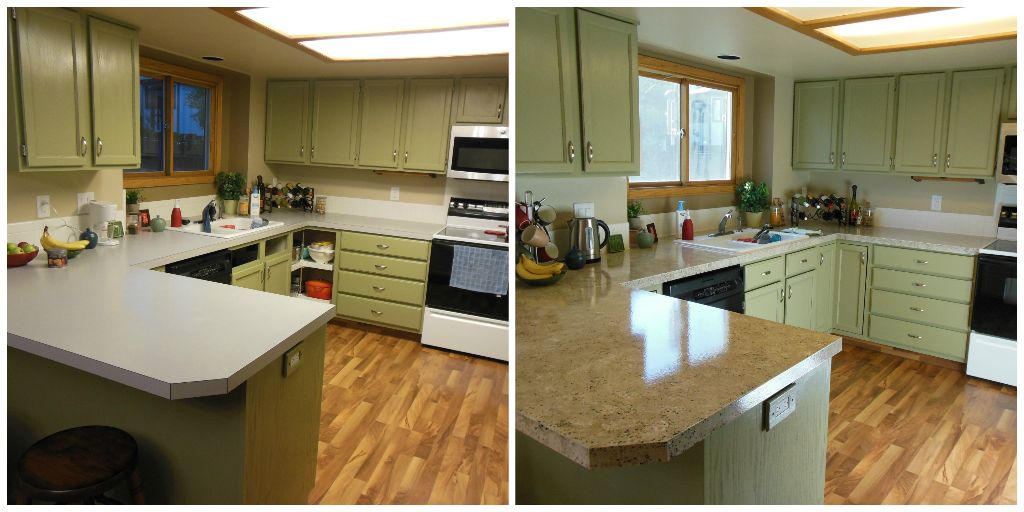
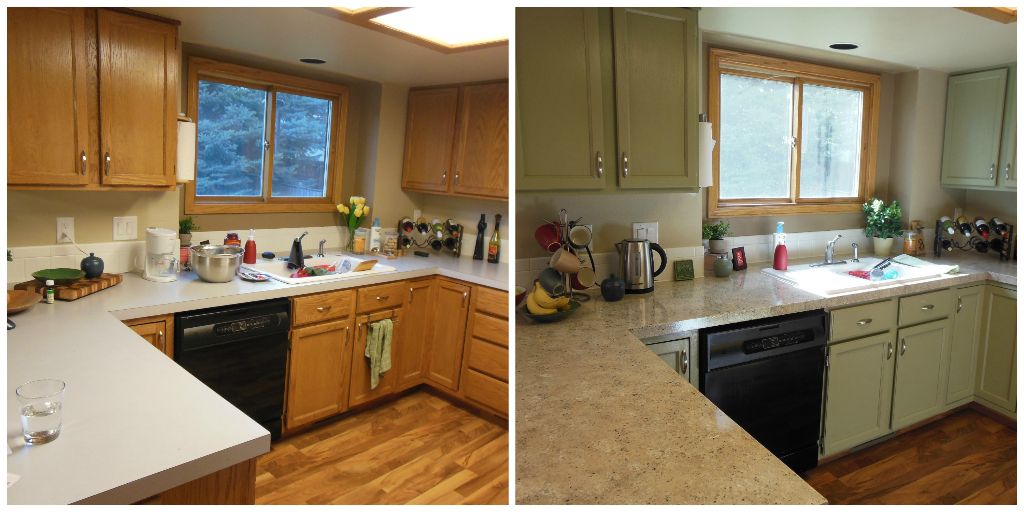
Countertops_before&afterAfter we painted our cabinets, it was time to update our grey, laminate countertops. In the future we want to completely replace them, but we aren’t ready to spend that much money (so many other projects to do at the house!), so in the meantime we decided to try a DIY countertop resurfacing kit. Matt and I both agreed that these had the potential to go horribly wrong… but we did some research and shopped around, and decided to give one a go! We settled on a kit by Giani Granite: the price was right, they had it in stock at Ace Hardware, and we could get it done in a weekend. The kit we used is also available on Amazon.

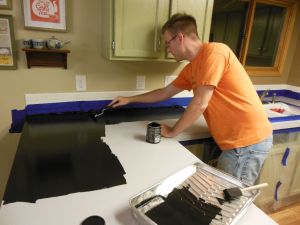
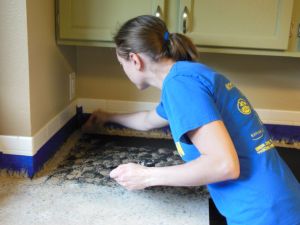
countertop - primerThe kit came with pretty much everything we needed: paint, roller, foam brush, etc., and even included a little DVD about how to do it right. This was helpful to watch! Before we started painting the countertop we had to clean it really well. We used those SOS steel wool pads that have the weird blue soap in them. Once that was all cleaned up we started painting! Our base coat/primer was black. After that had dried overnight we sponged on the three colors countertop - sponge paintingfrom our kit, two shades of brown and a white. When that was done drying, we gave it two coats of the clear coat. It was very quick and we spent the most time waiting for the paint to dry in between coats!

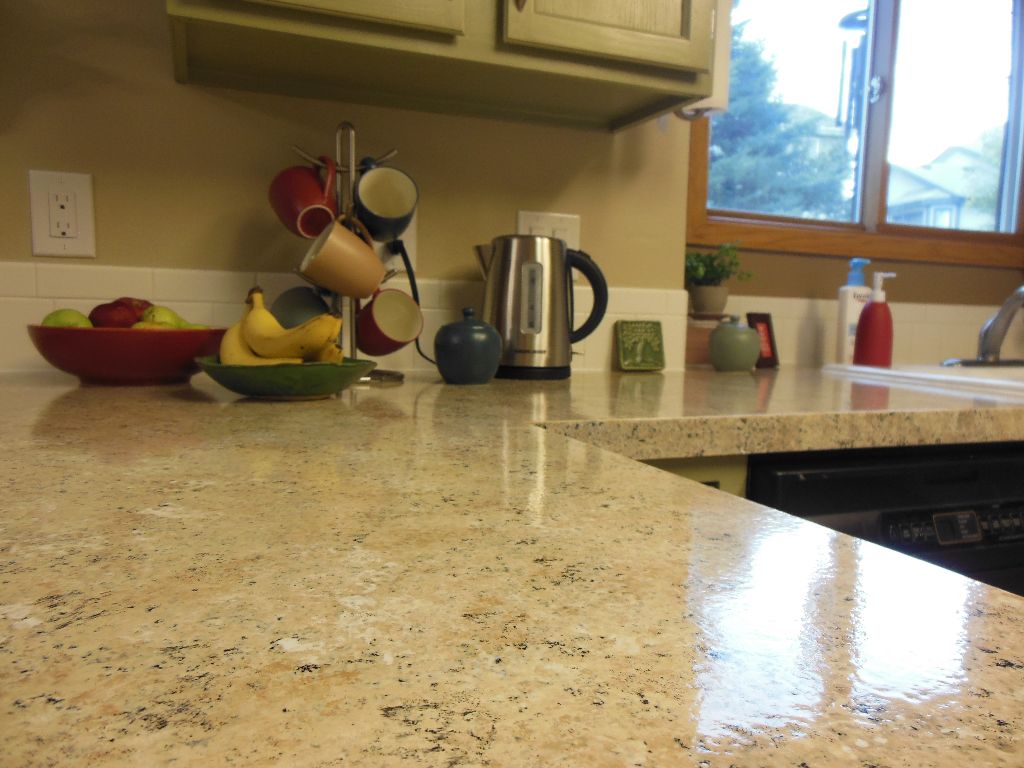
We are really happy with how they turned out! We love how they look (the color is such an improvement!) and we’ll just have to see how they hold up… in the end we want to replace them anyway, so even if they just last for a year or two, then it was worth it! The new surface is so much nicer to look at than the old grey!

Countertops - close

Painting Our Kitchen Cabinets

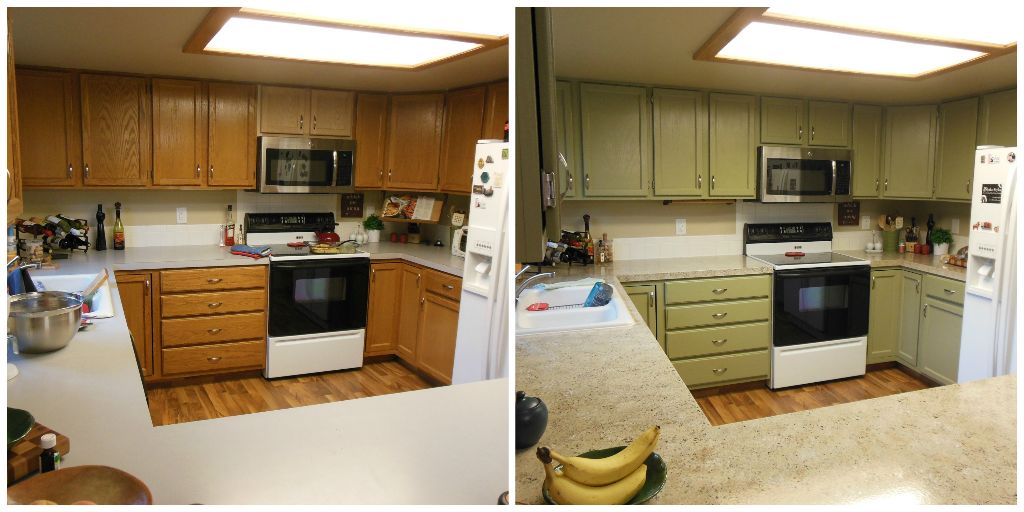
We painted our kitchen cabinets! “Gee, that a lot of work,” you’re thinking. And you’re absolutely right. It was a lot of work. But definitely worth it! See how awesome it looks?

Kitchen_before&after2 (Our countertops have also been resurfaced… more on that soon!)

Our cabinets were just your regular oak cabinets, the same in probably every house in our neighborhood. And our old neighborhood. And probably many neighborhoods across the city. And they weren’t in great shape, so we didn’t feel bad painting them!

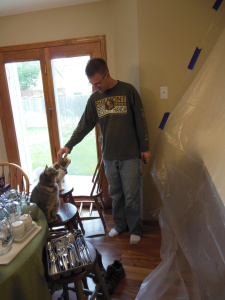
We taped off the kitchen to contain the mess and keep the kitties out. The cats were NOT happy about being excluded from the action.

We taped off the kitchen to contain the mess and keep the kitties out. The cats were NOT happy about being excluded from the action.

We followed the steps on how to paint kitchen cabinets from Better Homes and Gardens. They have some good instructions there and a materials check list that was pretty helpful. It definitely got us started. We also talked to some paint people at our paint store to get their opinions on paint and tools that we would need.

In case you are thinking of painting your cabinets, here are a few of our thoughts and lessons learned:

  1. The TSP was pretty impressive. Our house is 23 years old, so our cabinetry had some seriously sticky/gross spots from the previous owners that hadn’t come off for me with dawn or wood cleaner. The TSP took care of most of those bad spots! We definitely recommend using TSP.
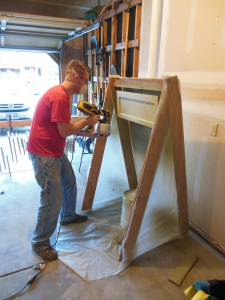
  2. We used Matt’s power sander where possible, but we realized too late that not all of the doors had been sanded equally. Definitely don’t skimp on your sanding or your sand paper. We realized after the first coat of paint/primer that some of the doors hadn’t been sanded very well and they ended up being harder to cover well. The paint didn’t want to go into the areas with deep wood grain. As a result, we brushed a coat on the front of the doors, when we’d hoped to only have to spray.  Speaking of spraying…
  3. cabinets - sprayingOn the doors and drawers, we used our awesome paint sprayer and it was amazing. It left such a nice even coat, with no brush or roller marks, and it was really fast.  The exception of course is the coat we brushed by hand because of the sanding/wood grain problem. But we still sprayed a coat of paint over the brushed coat because it looked so much better.
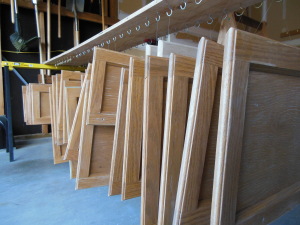
  4. On the cabinets bases left in the kitchen we brushed and used a small 3 inch roller. After the primer coat we learned that the brush left marks, and on the second coat we rolled where ever possible and brushed in just corners and tight edges.cabinets - hanging system
  5. Matt built an awesome hanging system that allowed us to paint all sides of the doors at one time. He left two screws in each door from the holes for the hinges and tied a piece of fishing line to the screws. Then he used mug hooks screwed into a big piece of plywood to hang all doors. Because we could move the doors around by the fishing line and hang them to dry by the fishing line, we were able to paint the entire door at one time, then hang it up to dry. He built a painting tent where we hung one door at a time, painted it, flipped it over, and painted the other side. Then we moved the wet door to the hanging system and retrieved the next one in line for painting. We didn’t have to wait for side one to dry before flipping over and painting side two. With over 20 doors in the kitchen it still took us a lot of time, but being able to paint the front and back together made it go faster!

Kitchen_before&after1Once we were done painting the cabinets we had to do something about the counter tops because now they looked seriously bad. For our next project, we resurfaced our counter tops!

Movies for England and Ireland

Chatsworth-0249mIn 2013 Matt and I went to England and Ireland! We went to visit his sister, Emily, who was finishing up a year at the University of Cambridge. The three of us took a little tour around England (London, Windsor, Stonehenge, Bath, Lancaster, the Lake District, the Peak District, Cambridge) and then took a little road trip around Ireland (Dublin, Galway, Cong, Connemara, Cliffs of Moher, Trim). We had a lovely time! Before our trip, we watched some English and Irish movies — we’d had such a fun time with our Vegas movies that we did it again! And this time, we enlisted the help of English and Irish friends who helped us create our lists. Thanks to Hilary and Gill!

Here was our list:

England:

  • Calendar Girls
  • The Iron Lady
  • Jane Eyre
  • The King’s Speech
  • Miss Potter
  • Notting Hill
  • Pride & Prejudice
  • The Queen
  • Snatch
  • The Young Victoria

Ireland:

  • Braveheart (its about Scotland & England, but it was on the list for Ireland because it was filmed at a castle in Trim that we visited)
  • Leap Year
  • The Field
  • The Matchmaker
  • Michael Collins
  • The Quiet Man

Movies for Vegas

Last summer we went to Las Vegas with some friends to celebrate our 5th wedding anniversary! We celebrated by having another wedding with “Elvis” as the officiant! It was a blast and our friends are so awesome for going along and dressing in crazy outfits with us!!

Las VegasTo get excited for our trip, we watched a few Las Vegas movies ahead of time! We wanted to get into the Vegas and casino mood, and also see an Elvis movie (we decided we won’t need to see more of them..!) Here was our list:

  • Ocean’s 11
  • 21
  • Casino
  • Viva Las Vegas

It was a really fun way to prepare! If you’re getting ready to go to Vegas, or just want to get in the Vegas mood, these movies might be fun to watch!

What are your favorite Vegas movies? Leave a comment!

Thoughts on Our Popcorn Ceiling Removal

So… it’s been a while since I’ve blogged about anything! Let’s just say that between starting my own business, Blythe Styles, buying a new house, selling our old one, moving, and spending a month in Europe, I’ve had a fairly busy 2014! But now that things are settling down, it’s time I report on some of our projects from this year! First up are some thoughts on our popcorn ceiling removal.

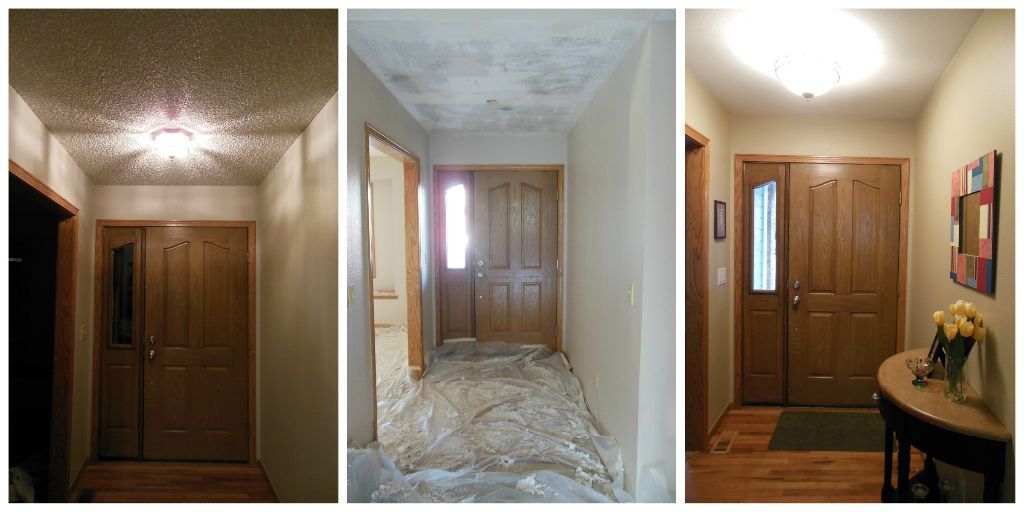
The house we bought this year had popcorn ceilings. If you don’t know what this is, you are lucky! But assuming you know what popcorn ceilings are, you will be glad to know that we had them removed! Here are before/during/after pictures of our entry way:

EntrywayCeilingCollageBefore: In the picture on the left, you can see the crazy amount of popcorn texture that the ceilings in the house originally had. I was so anxious to get rid of them!

During: In the center picture, you can see the texture has been scraped off. Next it needed to be re-textured (a light orange peel) and painted.

After: In the picture on the right, you can see the finished product (and a new light fixture). The ceiling is so smooth now, and instead of sucking light out of the space, it spreads the light nicely. :-)

We had read about popcorn removal online and decided that this was a project we wanted to hire out. Basically you need to get the texture wet, scrape it off, re-texture the ceiling, and paint it. Matt and I are big “do it yourselfers”, but this project was going to be really messy and time consuming. So we hired it out, and I’m SO glad we did. In the end, our house now feels cleaner and lighter, and we are so happy with our “new” ceilings. It is the best thing we’ve done for the house so far.

For anyone considering removing popcorn ceilings, here are some of our thoughts on the project:

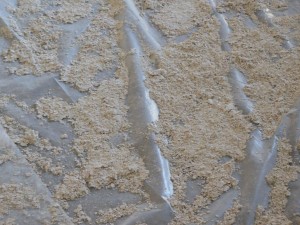
  1. Popcorn MessPopcorn ceiling removal is MESSY. I am not kidding. Be prepared for a big mess. On the right is a picture of some of the popcorn on the floor after it was scraped off. Now imagine this all over. And on your shoes. And everywhere you walk in those shoes for the next week. Our entire house was covered in drywall dust. The guys did a fairly good job of taping things off and using plastic sheets to cover the floors, but it still got everywhere. If at all possible, do this type of ceiling work in a vacant home. If that’s not possible, I would suggest vacating affected spaces as much as possible, covering what’s left really, really well, and taping off unaffected spaces as best as you can. It is so messy.
  2. Hire it out and understand the quotes. I was so horrified at the popcorn ceilings that they were the first item on our list of things to change after closing on the house. We wanted the ceiling work to be done by the time we moved in (that gave us 3 weeks). We’d already agreed to hire it out, so we got a few quotes as soon as possible and selected the team. We thought we had done our homework and knew what we were getting into, but we didn’t. We realized too late into the project that this particular team’s quote didn’t include painting. Lesson learned. Always make sure you know exactly what the quote covers. We decided we’d already spent enough money on the ceilings, so we ended up having to paint the ceilings ourselves, and it was a LOT of work. We spent HOURS painting ceilings at this house. We were really disappointed and felt pretty stupid… So know what the team is going to do. We assumed too much.
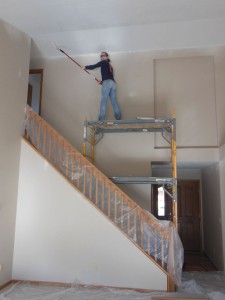
  3. Jenna with roller extension poleIf you end up the painting ceilings like we did, definitely get an extension for your roller or a paint sprayer. We bought a paint sprayer for a different project after the ceilings were already done, and Matt was kicking himself for not buying one sooner because it could have saved us a bunch of time. If you don’t want to splurge on a paint sprayer, at least get an extension pole for your rollers. This was a suggestion from my dad, and it was fantastic. We loved having the extension on the roller. (That’s me on the right with my roller and extension pole! Don’t you love the scaffolding too? We’re awesome.) Oh, and wear eye protection too. Matt always wears glasses so he was already covered (pun intended), but I usually wear contacts. I learned the hard way that painting ceilings WILL get paint in your eyes. And it hurts. So I wore my awesome blue safety glasses to protect my eyes after that first (painful) day.
  4. If you can, see samples of their work. We were in such a rush to get the ceilings fixed before we had to move in, that we selected our team really quickly. Probably too quickly. You learned above that the guys we picked didn’t paint… We also didn’t ask to see samples, and although our guys did a pretty good job, they did make a few mistakes. There are a few places where they gouged our ceilings a little bit during the scraping. Matt and I are probably the only ones who will ever notice those spots (they aren’t horrible or anything), but I still wish they weren’t there. If we’d been able to see samples of their work, we might have picked a different team.

In the end though, we are so happy with our ceilings now. They look great and they make the whole house feel so much better. We are so, so glad that we had the ceilings worked on and that we did the work before we moved in!


Winter Mantel

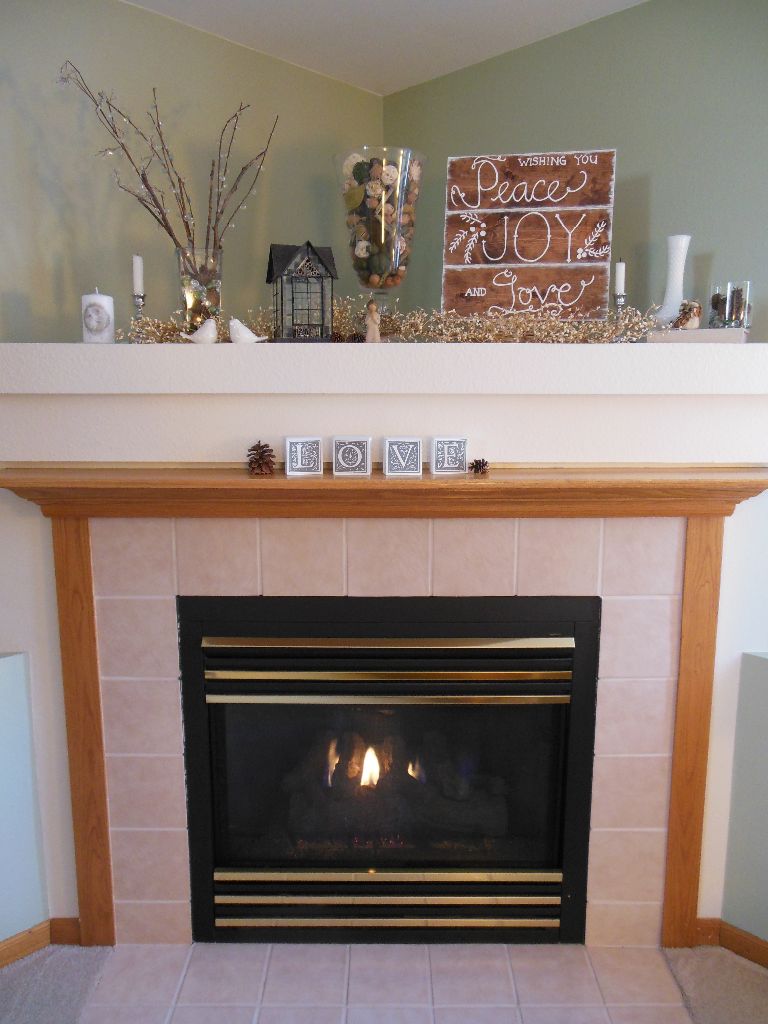
Christmas may be over, but winter is not! And winter is pretty. So I have left out my winter decorations! And this year I put together a new arrangement on my mantel! I didn’t buy anything new; I just rearranged things from around my house onto my mantel.

Winter Mantel 2014

Winter Mantel 2014 - birdsThe birds came from the kitchen – they are actually salt and pepper shakers!

Winter Mantel 2014 - lanternThe lantern used to live in my living room, but it looks quite nice here too!

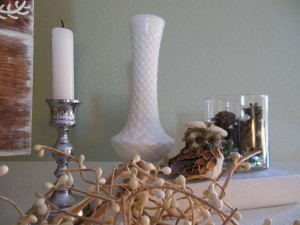
Winter Mantel 2014 - close upThe candle stick holder was my grandmother’s, and so was the white vase! The vase usually lives in my guest room. This little owl is actually a Christmas ornament! But he wasn’t very Christmasy, so I let him stay for the winter.

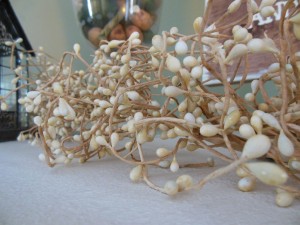
Winter Mantel 2014 - garlandThis white berry garland used to be my mom’s! Usually it lives on my mantel during the winter, but this year it looks so much better with more winter things around it!