Projects for Bella

After my Tinker Bell canvas and my butterfly garland, I was still inspired for decorations for Bella, so I decided to run with it and keep going! I pulled out my awesome purple glitter stickers, more paper punches and scrapbooking paper, and headed out to buy a frame and another canvas!

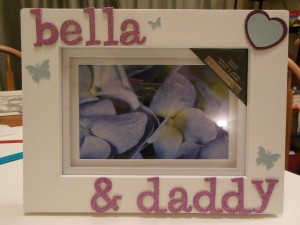
First I decided to decorate a frame ready to hold a picture of my brother and my niece:

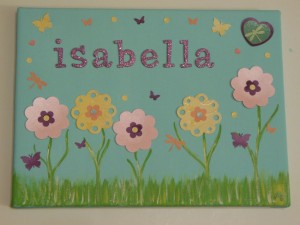
Bella frameThen I decided to paint another canvas and decorate it with Bella’s name, flowers and her favorite, butterflies! I used the same paints as on Tinker Bell canvas (plus some yellow this time), and a wider variety of scrapbooking paper and paper punches. After I put her name on the painted canvas, I just had fun with the flowers and butterflies!

Bella canvas

I had a great time putting these cute surprises together for Bella, and I really hope she likes all of her new decorations!!

Tinker Bell Canvas

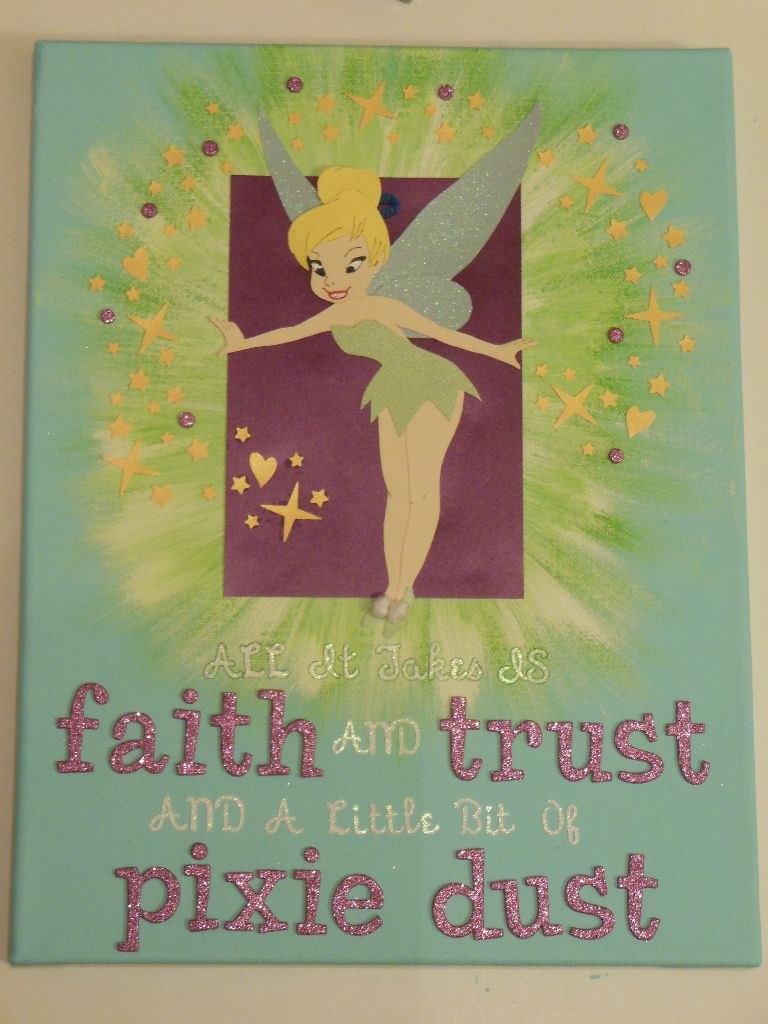
After my butterfly garland, my next project for my niece was to make her a Tinker Bell canvas! I hunted around on google for some ideas, and my favorite was the quote, “All it takes is faith and trust, and a little bit of pixie dust!” But I didn’t just want the quote – I wanted Tink on it too! So I decided to put them together!

Here’s the finished product:

Tinkerbell final 1This project took hours, but, like I told my mom, it’s probably the cutest thing I have ever made. Ever. I just love it! I can’t wait to see how happy it makes my neice!!

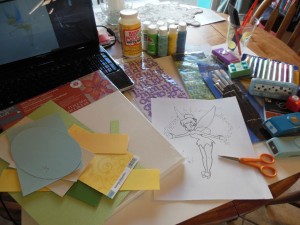
If I were good at drawing or painting, I would have painted Tinker Bell and the quote onto the canvas… but I’m much better with tracing, cutting, and gluing, so I made my Tinker Bell out of paper! And I also saved myself the stress of stencilling letters by using alphabet stickers for the quote!

Here’s how I did it:

Tink1Materials:

  • A Tinker Bell to trace! I found a great one at tinkfanatic.com and printed out a few copies
  • canvas (mine was 11×14)
  • paints: light blue, dark blue, green, white
  • paint brushes
  • markers: brown, green, black, red
  • paper: light skin tone beige something, green (mine was shiny), yellow, shiny gold, shiny purple, glittery blue
  • yarn: white, blue
  • adhesive: elmer’s glue, tape, double sided scrapbook adhesive
  • alphabet letters: big glittery purple, small glittery white
  • paper punches: various sizes of hearts and stars
  • scissors
  • crafty tweezers

Tink9Step 1: Prepare the canvas

  • I painted my canvas the light blue color. I think it took 3 coats.
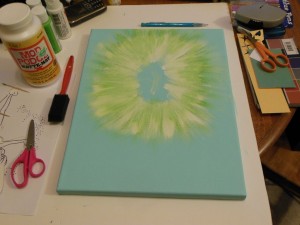
  • Then I painted the green and white burst from where I would later place Tinker Bell. Be sure to leave enough space at the bottom for the quote!
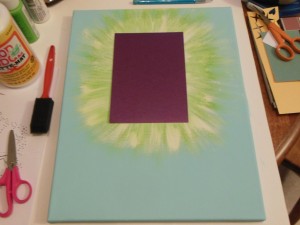
  • Tink10Then I used scrapbook adhesive and elmer’s glue to adhere the purple paper to the middle of the burst for Tink’s background. I tried modge podge, but it wouldn’t take…
  • Now the canvas is ready for Tinker Bell!

Tink2Step 2: Prepare Tinker Bell for Assembly

  • Have your Tinker Bell print out ready to go!
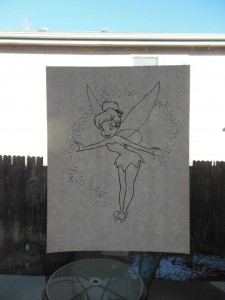
  • In lieu of a lightbox, I taped my Tinker Bell to a window so that I could see through and trace her body parts onto their appropriate colored papers. I was able to trace her arms, legs, face and hair using this method… which was great, because I was able to get the features on her hair and face just perfectly!
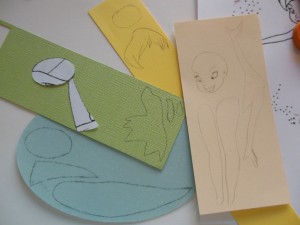
  • My thicker papers for her wings and her dress and shoes didn’t show through. So I had to cut them out of another print out, then trace those onto my colored papers. More work, but it turned out just fine!
  • Next I used my markers and paints to make Tinker Bell’s facial features, hair and knees. This was quite easy to do since I had been able to trace those things easily!
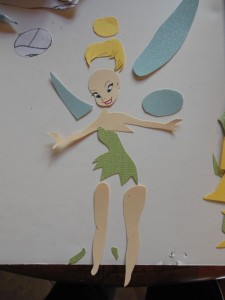
  • Then I cut out all of her body parts… and started to put them together. This was a little creepy to me. See for yourself…!

Tink5Tink6

Tink7Step 3: Assemble Tinker Bell

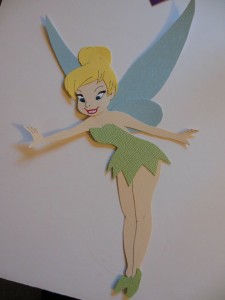
  • I used a combination of tape and scrapbook adhesive to stick Tinker Bell together. On the right, here she is all together, minus her shoe puffs and hair ribbon.
  • Lastly, Tinker Bell needed a hair ribbon and those little white puffs on her shoes. So I used my blue yarn and taped some behind her hair, and then tied little knots with the white yarn and glued them to her shoes. Now she was ready to go live on the canvas!

Step 4: Adhere Tinker Bell to the canvas!

Since I was sticking paper to paper, I mostly used scrapbooking adhesive to stick Tink on her purple background. But I did use a bit of glue in a few places too. Next she was ready for her pixie dust!

Step 5: Create Tink’s pixie dust!

I used my shimmery gold paper and my various heart and star paper punches and punched out a BUNCH of stars and hearts. Then I placed them all around Tinker Bell, similiar to the dust pattern in the picture I had traced of Tink. I used elmer’s glue and tweezers to place each tiny star and heart around her.

Step 6: Lay out and stick the letters on the canvas

I had already decided to emphasize “faith”, “trust”, and “pixie dust”, so laying out the quote was fairly easy. Those words got the big purple letters, all others got the little white letters. So I got them ready and started sticking them down on the canvas! Once they were all down though, I realized that my first line of white stickers was disappearing into the white and green burst I’d painted. No problem! I just outlined those stickers in green marker and it was ok again!

And that’s it! Now we have a completed Tinker Bell canvas perfect for my neice’s new bedroom!

Crocheted Butterfly Garland

Butterfly garland 1My brother and my niece just moved into a new house, so I thought my niece needed a few new things to spruce up her new room! My next few posts will be about my various projects for Bella. She’s really into Tinker Bell, butterflies, and fairies, so I had a lot of fun putting things together for her…! And my first idea was to crochet some butterfly garland for her room!

First I had to find myself a butterfly pattern. I wanted something easy, and thanks for the wonderful bloggers at Little Birdie Secrets, I found this amazing pattern for cute and easy crochet butterflies!

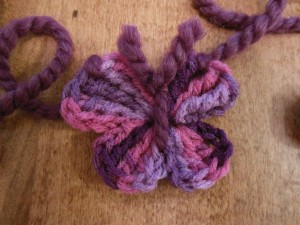
Butterfly garland 3So I got my stuff together (some variegated purple and pink yarn, and a crochet hook) and whipped up my butterflies in no time! I made 7 butterflies for my garland.

Then I used a darker, thicker yarn to tie them all together! I tied each one a little differently, to make them look a little random, like they were flying around. Some are tied with one wing, others with both.

Here is the completed garland – hanging on my mantel… I’m sure it will be much cuter in her bedroom! I can’t wait to see how much my niece loves it!

Butterfly garland 2

Pillows, pillows, pillows!

Pillow CollageI love pillows and, well, let’s just say they’re not Matt’s favorite thing. So for several years, I’ve been ignoring pillows in stores and at my house – I mean, I had a few here and there… but nothing for the seasons (and I LOVE decorating for seasons and holidays) and my bed needed some serious attention… but I was letting it go. But over Christmas I fell in love with some pillows I found, and just had to do something about it. I mean, if they’re in the way on the couch, just put them on the floor – that’s ok with me, I can put them back! When the room is put together, pillows can make such a big difference in the look of a room, and after a few years of being pillow deprived, I was ready to make some statements with my pillows.  And Matt, in the end, hasn’t really complained after all. Maybe he’s just used to my decorating antics by now..? :)

And now, I must say a special thank you to my mother in law, Kristi, who has made me many pillow covers in the last few weeks. Thanks to pinterest, I had tons of ideas, and she has made all my pillow dreams come true! Thank you, thank you, thank you! You’re amazing!!

Tree Pillows

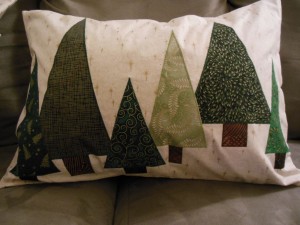
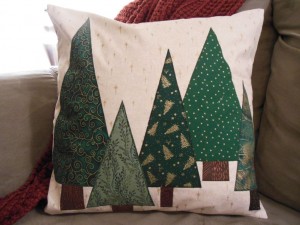
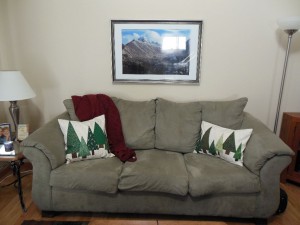
Tree pillow rectangleMy first pillow ideas were for some Christmas tree pillows I saw on pinterest that had been for sale on etsy. I showed it to my mother in law, who was so excited for a sewing project and was eager to get started. She had already made me some wonderful Christmas things, so we decided to have the trees made out of fabric that would match my existing tree skirts, wall hangings, and table runner! And they turned out beautifully!! I love them!

Tree pillow squareTree pillows on couch


Snowflake Pillows

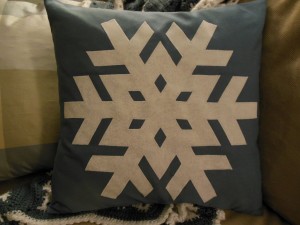
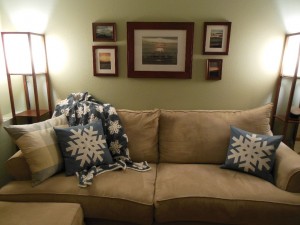
Snowflake pillowMy next pinterest pillow find was a wonderful snowflake pillow (with a pattern!) from shelterness, and Kristi and I agreed I must have them to match my wonderful crocheted snowflake afghan I’d just completed! We picked out some blue fabric to match my blanket, and she got busy making the covers for me. They are perfect!

Snowflake pillows on couchThese pillows also inspired me to update the wall arrangement above my couch in my family room. I switched out our large picture of a beautiful and colorful sunset over Lake Michigan for a slightly smaller one of a sunset over a frozen Lake Michigan. The frozen lake goes so well with my snowflakes! And when spring arrives, I’ll put my other frame back up to bring the colors back!

 Bedroom Pillows

Bed PillowsBecause of Matt’s dislike of pillows, we never bought decorative pillows for our bed… until just recently. I would make our bed, and all we had were the pillow shams that matched our duvet cover. It was lonely. Our set has long been discontinued, so I had to find my own things to match. I searched all over town, and found the perfect pillows at Pier 1, where Bed Pillowthey even helped me match colors! I was so thrilled with what I found – especially because two of them happened to be on clearance and I had a coupon! What a deal! And now my bed is complete and I am happy. The one with the beading on it is so beautiful. Love it!

Valentine’s Day Pillows

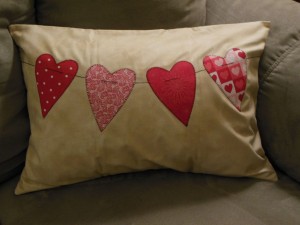
String of hearts pillowOnce I got started finding pillow ideas, I just couldn’t stop… and since Kristi was happy to sew for me, I put in a request for some Valentine’s day pillows too! I found one idea on pinterest, and the other two from searching on google. Thanks to the following blogs and sites for their great ideas: A Crafty House, U create, and mypillowhead.com!

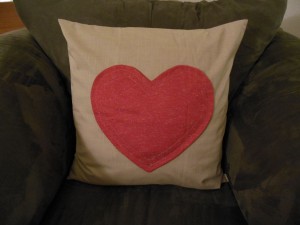
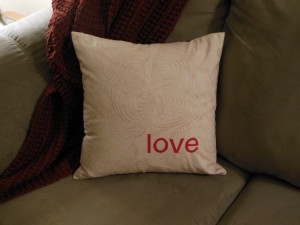
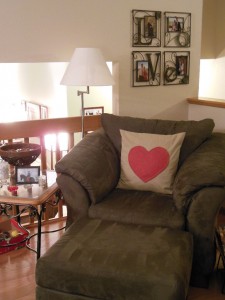
The string of hearts pillow is my favorite – it’s just so, so cute! But the heart and love pillows are also adorable – and the set of three just completed my Valentine’s day decorations perfectly!

Heart PillowLove Pillow

Valentine's Day Pillows on couchHeart Pillow in chair

Saint Patrick’s Day Pillow

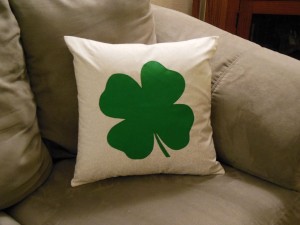
Shamrock PillowThat’s right. I decorate for St. Patty’s day too – after all who doesn’t love green things, Irish music & dancing, Guinness, and delicious Irish food? So why not have some shamrocks and little leprechauns too? Anyway, I found this cute pillow on zazzle, and asked Kristi to reverse the colors to match my furniture better  and her version for me is perfect!

Bird Pillows

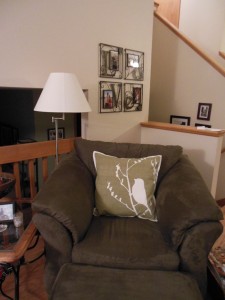
Bird Pillow on chairI love all little bird things… I just can’t resist them. So when I found some adorable bird pillows at Home Goods last month, I had to buy them! They are so cute! When winter is over and I put away my snowflakes, my bird pillows will come out to live with us for the spring and summer. I’m looking forward to their visit already! (also, note the different sunset photo in the picture below!)

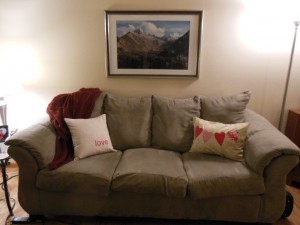
Regular pillows on couch - family room

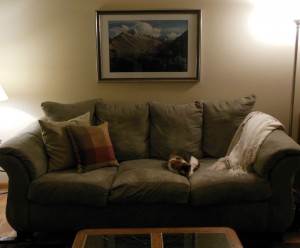
My regular living room pillows & my cat, Kiki

Regular pillows on couchThis is the way my living room couch usually looks – except now, these pillows have covers for several holidays! It’s so exciting!

I have been thinking about fall pillows and have some ideas in mind… but nothing definite yet. There are so many ideas out there! But luckily I have some time to think about it! And a wonderful and talented mother in law who’s happy to indulge in my pillow love. :)

Crocheted Valentines

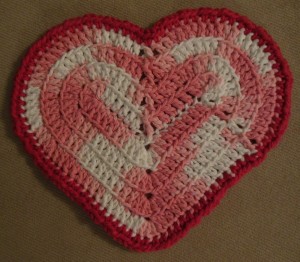
I crocheted some adorable heart themed dishcloths and pot holders for Valentine’s day this year! Most went into a thank you package for my mother in law, who has been doing lots of amazing sewing projects for me! And just a few dishcloths stayed behind for me and some others. :)

Valentine washcloth 5Heart Dishcloth #1

I found the pattern for this cute little one here.

I also used this pattern to make a couple of pot holders with much thicker yarn. So cute!


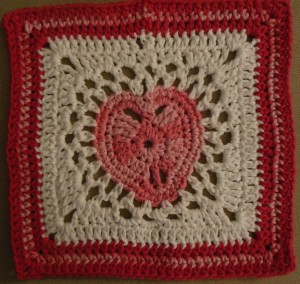
Valentine washcloth 4Heart Dishcloth #2

This one is adorable, but I found it to be the most complicated. I had to pay very careful attention to my counts and my stitches. I found this pattern on pinterest, available from http://www.ravelry.com/projects/Teacuplane/heart-blanket-crochet. The pattern is actually for a blanket, but I just made one square with cotton yarn and called it a dishcloth! :)


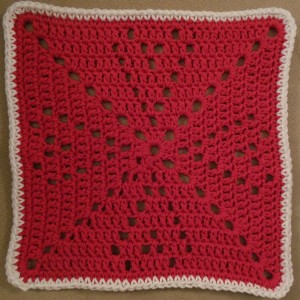
Valentine washcloth 1Heart dishcloth #3 and variations on that theme…

This one was my favorite, but I actually didn’t follow the pattern too closely..! It was more of a guide — but definitely a great one! And very easy and quick!  The original pattern is here: http://www.heartmadeblessings.org/Patterns/Caringhearts.php

My changes from the pattern:

Valentine washcloth 2

  • After I made the first one, I decided to start the heart one row sooner… because I felt like it!
  • To keep them from getting too big for my liking, on the last two rounds I used single crochet instead of double.
  • I had seen pictures of the hearts made of spaces (like mine are) instead of the special stitch the pattern uses. Whenever it called for the popcorn stitch, I just did a single chain and moved on.
  • On a couple of the dishcloths I used a different color on my last round – just for fun!

Valentine washcloth 3

Valentine washcloth 6

Christmas Scavenger Hunt

My husband, Matt, did a very cute and sweet thing for me for Christmas this year… and although he has his own blog, it’s a nerdy blog, so he thought I should write about it here instead of on his… I guess his nerdy followers don’t want tips on how to surprise their significant others? But I’m happy to share the love!  So here we go..!

I have been collecting some snowflake dishes from Target for the last few years. I have a variety of pieces for the set and I love them all. This year, Matt was adding more mugs and bowls to my set – and I already had a couple of these, so they wouldn’t be a huge surprise and he wanted to make it special. So, my clever and thoughtful husband decided to make a scavenger hunt out of my gifts. But not just any old scavenger hunt — he re-wrote “The Night Before Christmas” into the clues! (I like to give myself a bit of credit for this since we had just read it on our date night, but he might have had it planned before then? I don’t know. But either way, it was really awesome).

So here’s what he did – he saved the last gift under the tree to be the first one of the hunt. I opened it up and it was one of my snowflake mugs, with a piece of paper in it – My first clue!

‘Twas the week before Christmas,
and all through our home
Some more gifts are still hidden.
Your guide is this poem.

Old costumes are placed in
this closet with care.
Below the cowboy hats-
a gift might be there.

I was as excited as a little kid!! And so surprised! So I run upstairs to the closet where we keep our Halloween costumes, and sure enough, there’s another gift there! With another clue:

The kitties get nestled
all snug in our bed
with visions of fresh catnip
prowling in their heads.

You don’t wear a kerchief
nor wear I a cap,
But I open this drawer
before a long winter nap.

He keeps his pajamas in the drawer in his night stand, so of course, I found the next gift and clue there in his pjs! By this time I’m madly reading the lines and running around the house. I think Matt had quite the thrill watching me act like a 5 year old… It was fun!

When down in the kitchen
there arose such a clatter!
It must be a bad kitty,
I’ll see what’s the matter

Away down the stairs I
fly like a flash,
Good thing that our cats
can’t get into the trash.

We have the cabinets baby-locked in our house because our kitty, Theo, can open cabinet doors… so I opened the cabinet under the sink where the trash lives, and there on the ground (not in the trash!) is my next gift! And of course, another clue!

The moon through the window
of the guest room upstairs
Reveals a bed covered by sheet
to attract kitty hairs.

And I bet if you dig,
you will find in that bed
another little something
nestled up by the head.

This clue is referring to our guest room bed, which I do keep covered with a sheet to keep the kitty hairs off of the pretty comforter. It’s way easier to clean that way… anyway – I dug in the pillows, and sure enough! Another piece to add to my snowflake dish collection! And another clue!

Now skiiing, and snowboarding,
and tubing, and sleddin’
and snow angels, and snow caves
dug deep with your head in

Require certain clothes
to stay dry and warm.
A gift hidden in these
won’t see any harm.

In our front closet, we have a big tote of winter gear, so I pulled that down and dug around… sure enough another present! This one had the last bit of the poem:

You’ll be sad to hear
this is the last gift in sight
Merry Christmas to you,
hope you’ve had a good night.

And I did have a good night! Thank you, Matt. You’re so sweet to me!

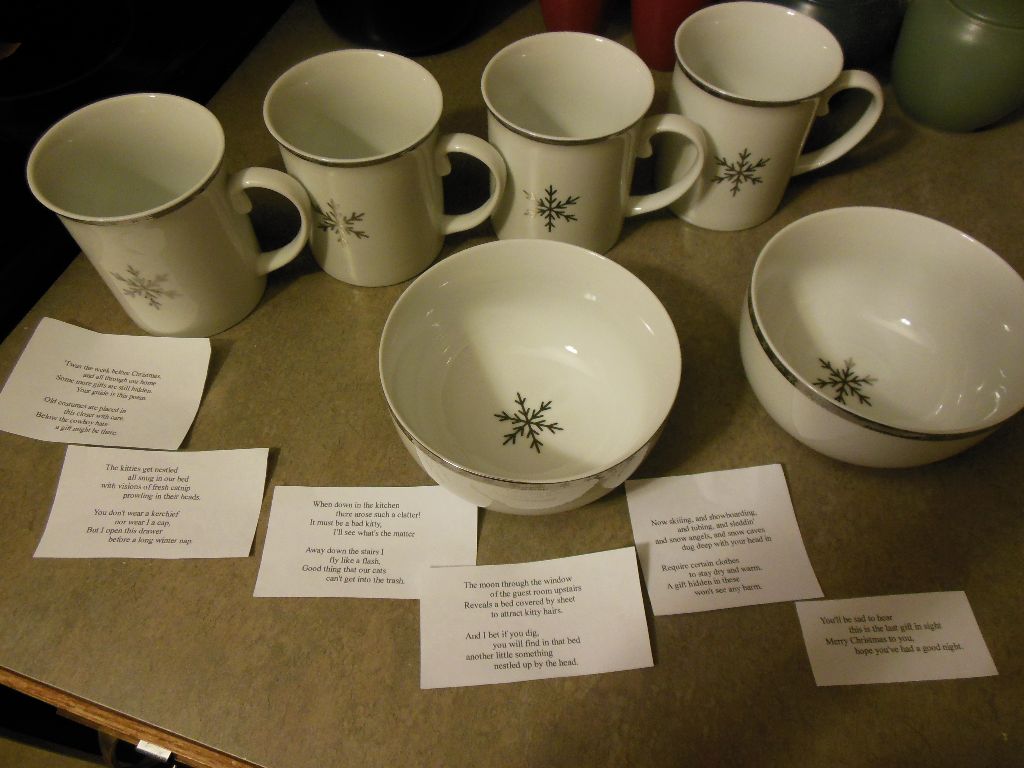
 Here are the beautiful pieces he added to my set, along with their clues:

Snowflake china & poem

12 Dates of Christmas – 2012

This past December I put together 12 dates of Christmas for Matt and myself! I collected some various ideas online, but mostly put together a list of things we enjoy doing at Christmas, along with a few special activities. I just wanted to do something a little different this year! And I wanted to do something to remember the fun things we did together to celebrate the season.  I tried to make most of the dates cheap, so that we didn’t spend a fortune going out 12 times during an already expensive time of year!
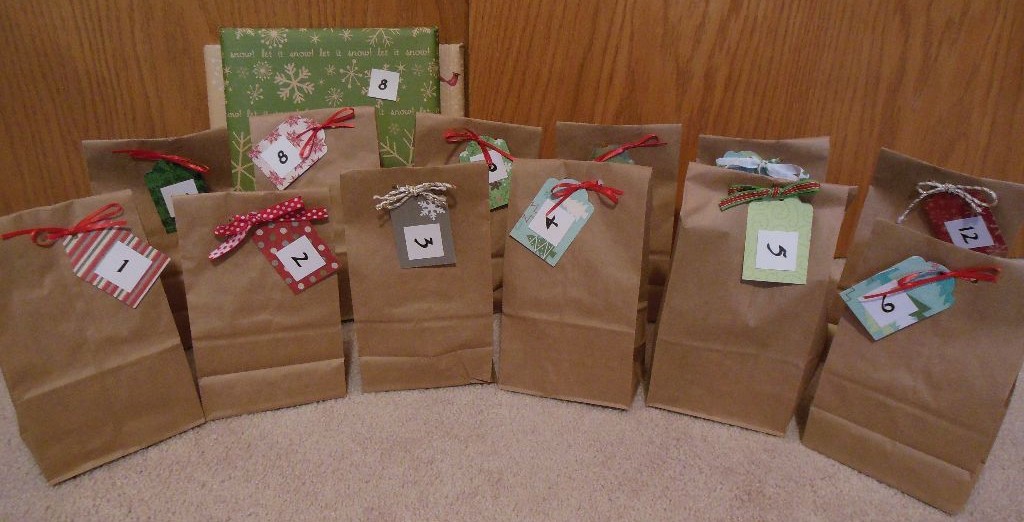
12 Dates of Christmas 2012After I made the list of our dates, I had to do a bit of shopping. To remember the things we did on our dates, I decided to make or buy an ornament for each date. (I LOVE Christmas ornaments.) I wrote on the ornament which date of Christmas it was and the year (I usually did this on the back of the ornament). Some of the dates required an additional small gift for the date to happen, so I had to buy a few things. Then I wrapped up the gifts and made little notes about each date. Then I put the gifts (if any), the ornaments, and the date notes into separate brown paper bags, which I tied with pretty ribbons and pretty numbered gift tags I made – one for each date!

Here are the dates we did:
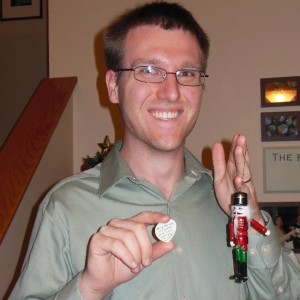
1st Date Xmas 2012Date #1: Seeing The Nutcracker

We went down to Denver to see the Colorado Ballet’s performance of The Nutcracker! It was wonderful! I love going to the ballet, so this was a big treat for me, but also for Matt who’d never seen The Nutcracker before. Glad we fixed that! And I gave Matt an adorable little Nutcracker ornament to remember our night out!

2nd Date Xmas 2012Date #2: Watching Elf

Elf is one of Matt’s favorite Christmas movies, so it definitely made the date list. We snuggled down by the fire with the kitties and watched Elf! And I made this adorable ornament out of a small piece of wood from a craft store, red paint, glitter stickers, and ribbon! Easy and cute!
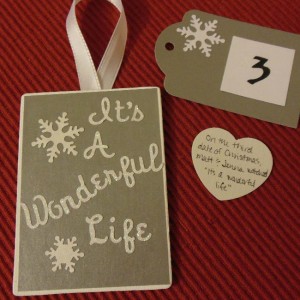
3rd Date Xmas 2012Date #3: Watching It’s a Wonderful Life

We LOVE this movie, so it also had to make the date list. And again, I made a lovely ornament to go along with it! This ornament is made of the same wood, along with some silver scrapbooking paper, glitter stickers, snowflake paper punches, and white paint and ribbon.

In this picture, you can also see the gift tag and note that went along with this date.

4th Date Xmas 1 2012 Date #4: Enjoying lights in Old Town

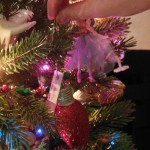
Our downtown puts on a beautiful light display all winter long, so on this date we bundled up, made some hot chocolate to go, and headed to 4th Date Xmas 2 2012old town to walk around and enjoy the lights. It  was so pretty! If only there had been some snow too! The ornament for this date was a small glittery light bulb shaped ornament!
5th Date Xmas 2012Date #5: Watching How the Grinch Stole Christmas

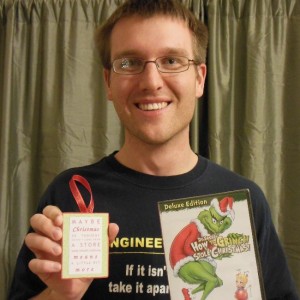
This is one of the few great Christmas movies we did not yet own, so I had to buy it to stick in the date bag! Again we snuggled up with the kitties and the fire, and watched the good old Grinch.

The ornament for this date is also one I made. This one is hard to see in the picture, but I painted another wood piece red, then put some green patterned scrapbooking paper on it. Then I printed out on white cardstock the phrase from the movie, “Maybe Christmas, he thought, doesn’t come from a store, maybe perhaps Christmas means a little bit more”. I mounted that on top of the green paper, attached a red ribbon, and it was ready to go!

6th Date Xmas 2012Date #6: Lights at the city gardens

Our city gardens do a wonderful light display every Christmas. We had never been to see them, so I made it a date and we checked them out! The night we went was extremely cold, so we might have rushed through the gardens a bit, but it was definitely worth it. The lights were beautiful! The ornament for this date was another small light bulb, but just a shiny one, not a glittery one! (Seen in picture for date 7!)

7th Date Xmas 2012Date #7: Watching Home Alone

This movie is too funny not to watch at Christmas time! So we locked our doors, snuggled up, and watched Kevin defeat the wet bandits! My ornament for this date was a key to our house with a heart on it, on a pretty ribbon!

8th Date Xmas 2012Date #8: Reading Christmas books

I love Christmas stories! And since we don’t have kids (yet!), we only had a couple of little Christmas books I’d brought along from home. I decided we needed a couple of the classics, so I picked up The Polar Express and The Night Before Christmas and wrapped them up for Matt! We snuggled up by the fire, with the kitties, of course, and Matt read the books to me. Such a nice evening! The ornament for the night was a pair of Christmas bells.
9th Date Xmas 2012Date #9: Baking Christmas Cookies

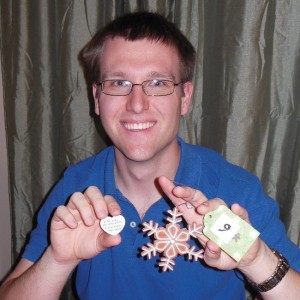
What’s Christmas without Christmas cookies? Even though it’s just the two of us, we had to make some cookies to enjoy, and to pass around at our workplaces! Yum! The ornament for the night was a really cute cookie snowflake ornament.9th Date Xmas 2 2012

Here’s a picture of Matt swirling  the mints on our  Andes Mint Cookies!
10th Date Xmas 2012Date #10: The Muppet Christmas Carol

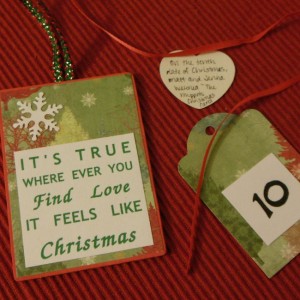
This is probably my all time favorite Christmas movie. It’s definitely not Christmas without watching the Muppet Christmas Carol! It’s just so good! The ornament for this date was another one I made, with a quote from one of the songs from the movie!
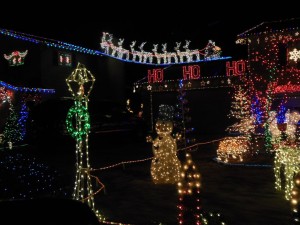
11th Date Xmas 1Date #11: Driving around to see Christmas Lights

This is something my family always likes to do, and Matt’s family too – but since we don’t spend Christmas here in Colorado, we’ve never really ch11th Date Xmas 2 2012ecked out the lights around here. So I decided that we should make that a date! Again, we made some hot chocolate to go, Matt looked up where the best lights were in town (thanks, google!) and we headed out! We saw some really impressive displays!

Christmas 2012Date #12: Our Christmas in Colorado

We always celebrate our Christmas together right before we go to home for the holidays, so that was our last Christmas date! We went out for a nice dinner, then came home and exchanged gifts! The ornament for this date was a snowflake ornament frame, which now holds this picture of our little family!

All in all, we had a very merry Christmas! To add to the wonderful things we did, one of my friends gave us an amazing advent calendar of gifts this year, and Matt made my gifts extra fun too! Christmas really is the most wonderful time of year! Full of love, family, and surprises.
Chalkboard Clips

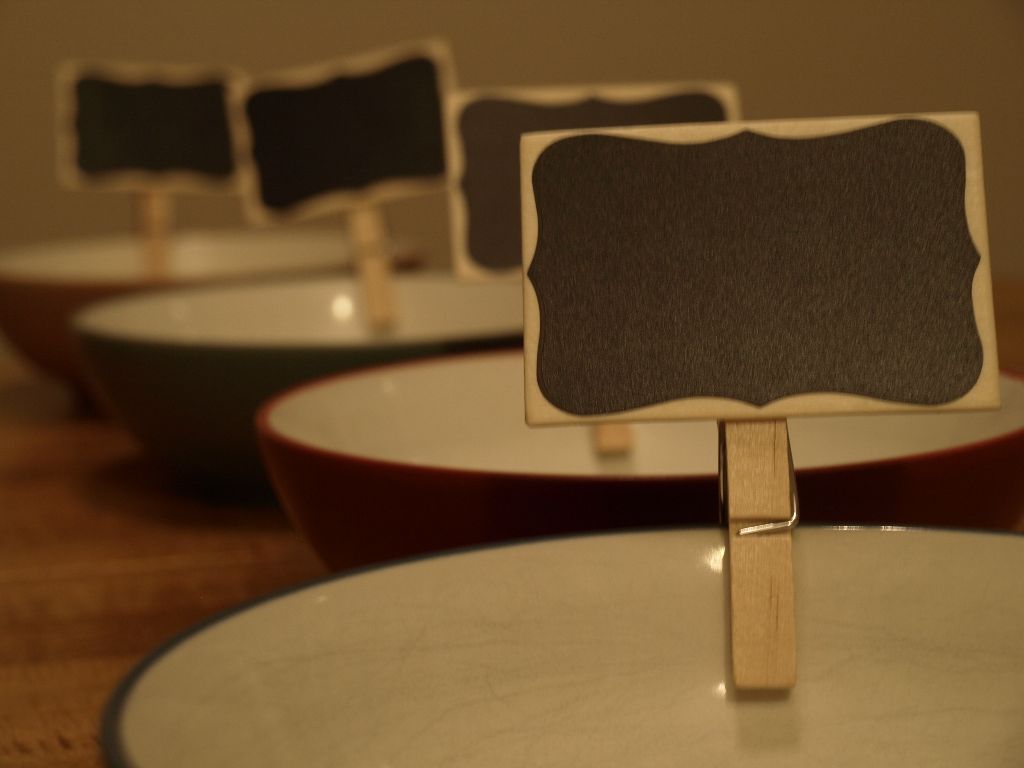
Chalkboard clips 4Recently Matt and I had some friends over and made some good, but sort of unusual foods. Since I didn’t have enough time to tell everyone what things were, some people hesitated to try things. Enough of that! I want people to eat my yummy food. So after that night I decided I must make some of those cute little chalkboard clips floating around on pinterest, and then my guests will always know what food is there! There are many of these clips out there; this is one example from Happy Clippings.

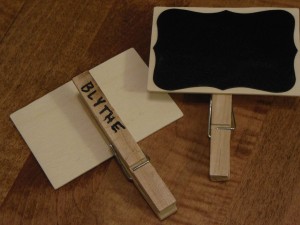
I wanted to make these as easy as possible, so the next day I set out to find tiny little chalkboards; I know they used to exist because we did crafts with them when I was a kid in Girl Scouts. But I couldn’t find them… and I didn’t want to paint them because I was too lazy for that. When I asked a person at Michael’s, he suggested I use these chalkboard stickers that they had in the floral department. They were perfect and cute!

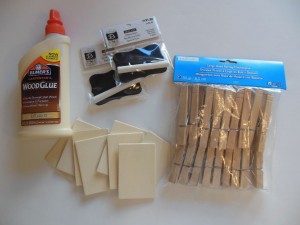
Chalkboard clips 1My materials:

  • Clothespins
  • Chalkboard stickers
  • Little tiny wood boards that were the same size as the chalkboard stickers
  • Sandpaper
  • Wood glue
  • Chalk (mine came with my chalkboard stickers)


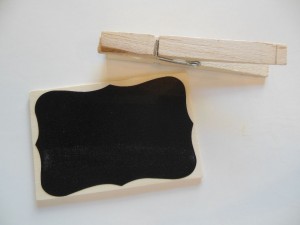
Chalkboard clips 2Assembly:

  • Do a little bit of sanding on the wood boards if they are rough.
  • Put the chalkboard stickers on the wood boards. This was so easy and took no time at all. After all, they were just stickers!
  • Glue the (now) chalkboards to the clothespins!
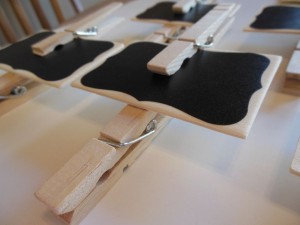
  • Chalkboard clips 3Clamp the clothespin and the chalkboard together with an extra clothespin. (It says on the wood glue to clamp the items together that you are gluing, and what’s more convenient than the pile of clothespins you have next to you?)
  • Let them sit for a few hours like that.
  • Then, you’re done! Easy!!

Chalkboard clips 6I also wrote our last name on the back of my clips – that way when we go places people can know who the dish belongs to, and who made the delicious food!!

This project was so easy and so cute! And I’ve already used my clips once! Matt took some extra pumpkin cranberry bread into his work this week and we put one of my clips on the bowl. Perfect!

Some other ideas and tips:

  • The wood and clothespins could be painted or decorated with scrapbook paper for different seasons or holidays or just if you don’t want the bare wood look!
  • Michael’s had a couple of different shapes of these chalkboard stickers – different shapes could make cute clips too!
  • A suggestion my mother in law had was to use a chalk pencil instead of a piece of chalk to do the writing on the boards. This was genius! I found a “dressmakers pencil” at Joann’s and it works like a charm. Much neater writing on the boards, and no chalk on your hands afterwards!

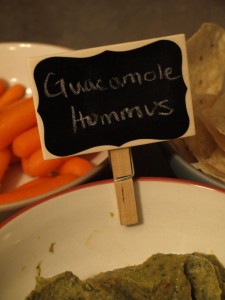
Chalkboard clips 5Here is one of my clips on some delicious guacamole hummus. The clips are so cute! I can’t wait for all the parties and potlucks where I can use them and show them off!


Wedding Vow Art

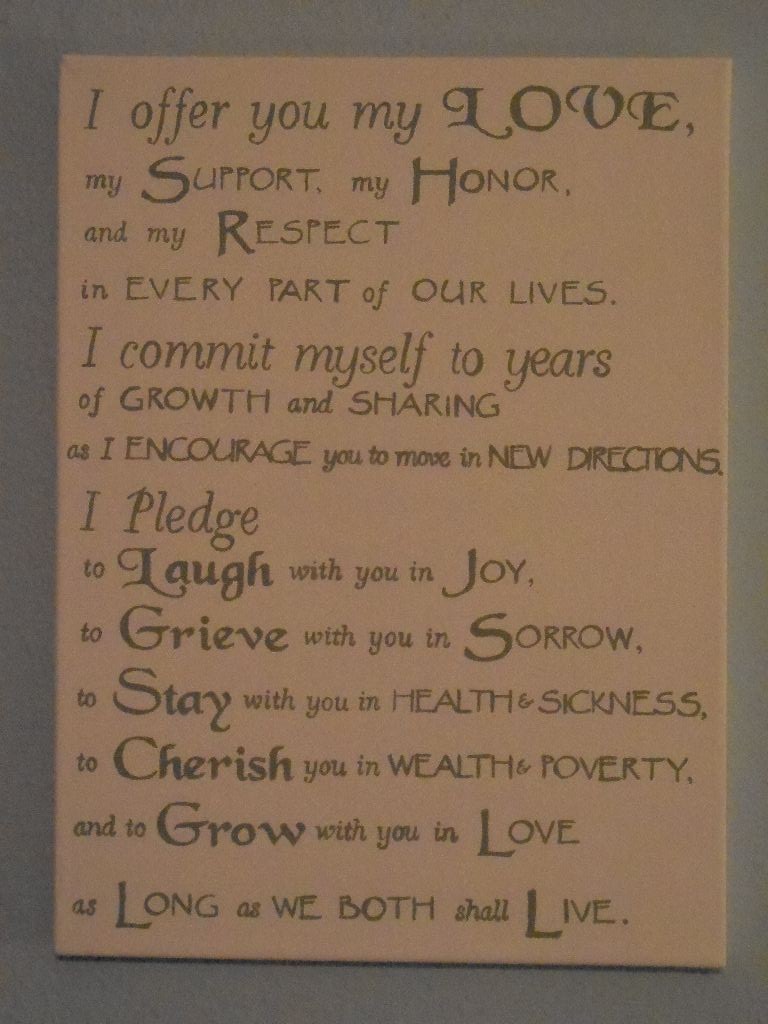
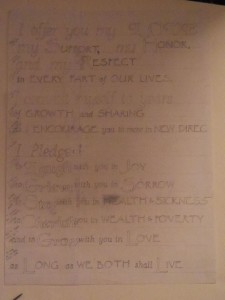
When we got married, Matt and I wrote our own wedding vows (with the help of a book from the minister) and we really liked what we came up with! Since our wedding I’ve been wanting to display our vows in our home somehow, and recently I decided to paint them on a canvas! Here it is:

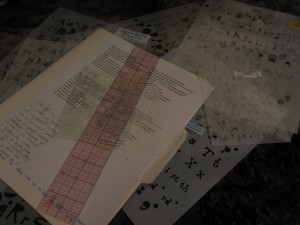
To make it, first I bought a canvas and some paint from Michaels. Then I made a practice “canvas” out of paper that I taped together. After deciding how many lines I wanted for the vows, I measured out and drew lines on my paper. Next I decided which words in the vows I wanted to emphasize with special fonts. Then I started stencilling on the paper. I have a nice selection of stencils made by The Crafter’s Workshop, so I just picked a few fonts and dove in. I ended up doing quite a bit of erasing though, as I changed my mind about fonts and sizes and capitalizations. It took me a few tries to find what I thought looked good.

When I was finally finished with my practice piece, my hands were covered in graphite, my paper was smeared, my back was killing me, my floor was covered in eraser dust, and my kitties were ready for bed. I, however, wasn’t ready to quit for the night!

To get the canvas ready for stencilling, I painted the background a really light creamy color. After it dried I carefully measured out my lines on the canvas and drew them as lightly as I could. Looking back I see they aren’t perfect, even though I was so careful, but that’s ok with me. It’s just part of the charm, right?? Then I started my stencilling. When I was happy with the spacing and everything, I started painting the words. I tried to make my first coat pretty thick, but I ended up going back later and touching up a few letters where there were thin spots.

Once I was done painting the letters, I carefully erased my guidelines… but there were some spots where they didn’t erase very well. So I brought out my background color again and just touched up spots where my pencil was still showing! Yay paint!

In the end the whole process took hours… I don’t even know how long. But it was worth it! I am so happy with the finished product! And now our beautiful wedding vows are hanging in our bedroom to remind us every day of the promises we made to each other.

Update 18 January 2013: Here’s a picture of our room with the hanging canvas (and two sleeping kitties!) – just for you, Mom!

Snowflake Afghan

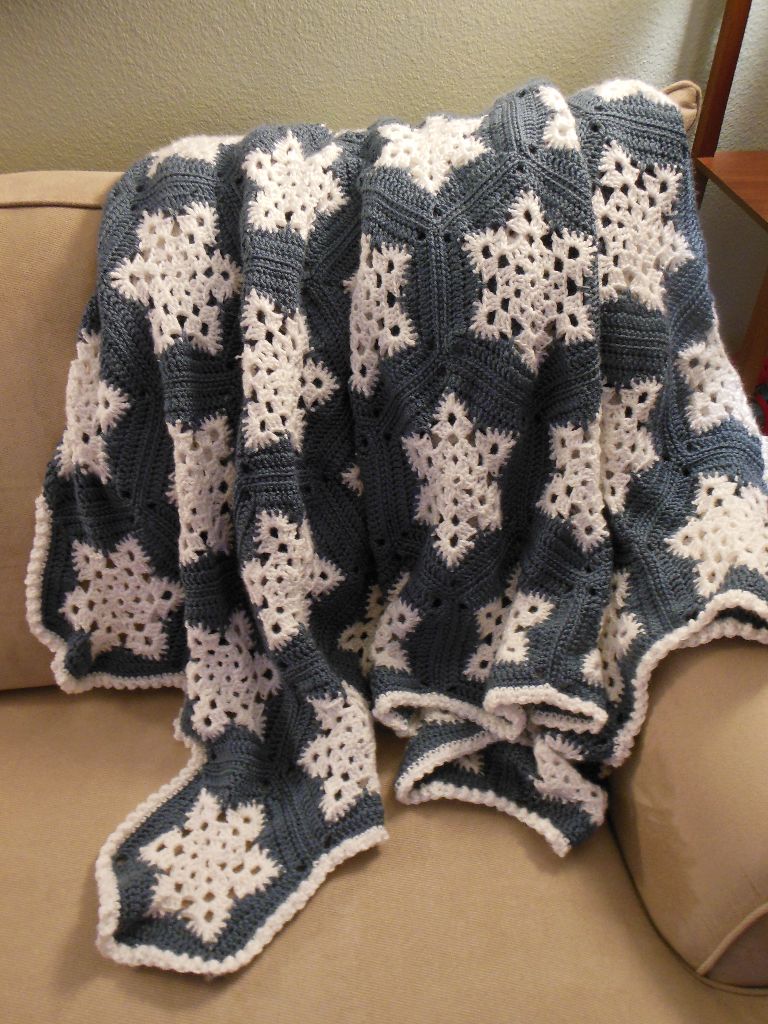
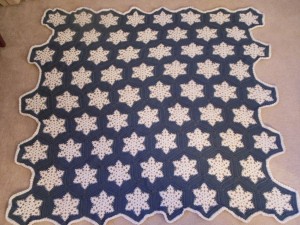
A couple of months ago, I saw a pin on pinterest of this blog post and I knew I just had to make myself one of these afghans! And today, I finished it! I’m so pleased with it and I’m so glad that I have it done in time to enjoy it for the whole winter. After all, I don’t store away my snow décor after Christmas – I enjoy my winter things all winter long!

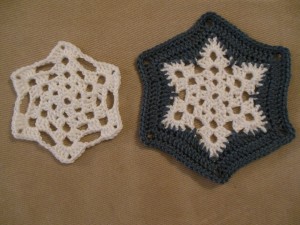
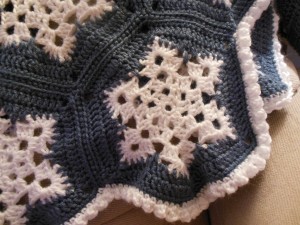
The original white snowflake looks a lot different from the finished snowflake with the blue around it!

The pattern I followed is free from artoftangle.com. As far as crocheting patterns go, I thought it was pretty easy to follow. Once you figure it out, you just make as many snowflake hexagons as you want! The pattern calls for 59, but I actually made my blanket slightly larger – I made 68. I just added one hexagon to each row. Each hexagon took me around an hour to make.

I started making the afghan probably about 8 weeks ago or so, and I tried to work on it a little every day. Once you have some hexagons done, you essentially sew them together in strips and then sew the strips together. Then magically, in no time, it turns into a blanket!

Once you have the blanket as large as you want it to be, you put the edging on. It was easy to do, but took longer than I expected. The edging just repeats single, triple, single, triple, all the way around. It gives it a nice little bumpy edge!

Below: the completed blanket! I just love it!